Arduino microcontroller programming for beginners
Check how simple and easy it is to program Arduino microcontroller.
Its compact, powerful, goes with hundreds of additional components that allow you to feel how it is to be a real engineer. Let this guide inspire you to build your own devices, micro machines, smart-house components and many more!
Setup your board and IDE
Step 1 – you need to have Arduino board. There are many types of boards as well many clones, for a start Arduino Uno is the cheapest choice.
Step2 – Download Arduino Ide software. Download IDE software compatible with your OS from official page https://www.arduino.cc/en/Main/Software .
Software is working with original board and also with cheaper clones.
Step3- Power up your board. Connect Arduino board to PC with usb cable.
Step4- Launch and configure IDE.
- File->New for starting new project
- Tools -> Board for select type of board you are using
- Tools-> Serial port for selecting port board is connected to
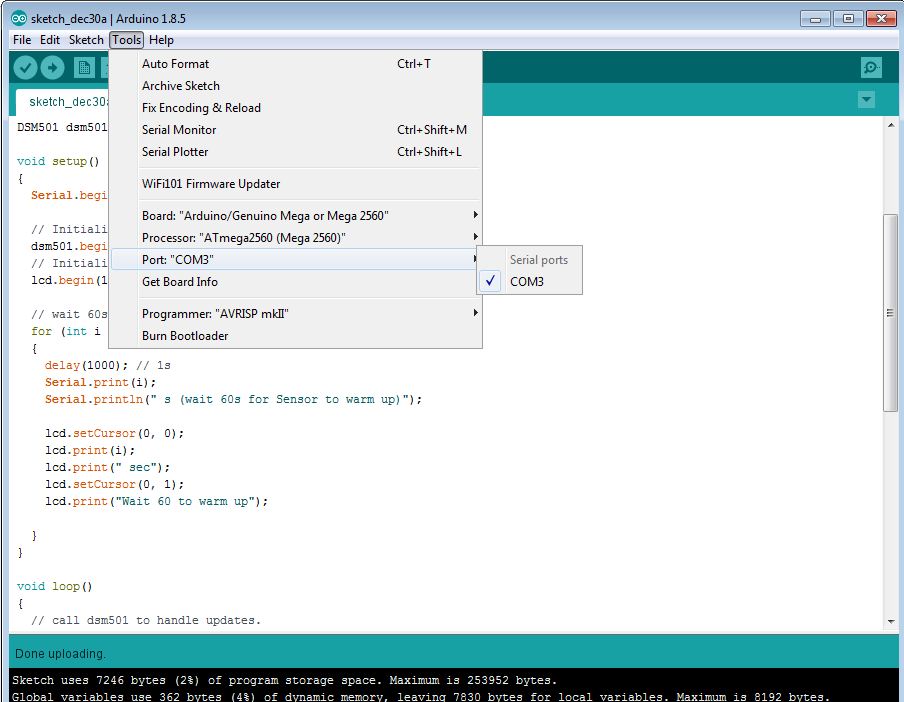
Now you are ready to write a code.
Code structure
The Arduino software is open-source. The source code for the Java environment is released under the GPL and the C/C++ microcontroller libraries are under the LGPL.
Code Structure consist of two main functions
- Setup() function
- Loop() function
Void setup () {
}
Setup function is used to initialize variables, pin modes, attach libraries. This function will only run once after powering up a board or after reset.
Void loop () {
}
This function loops consecutively allowing program to change and respond. Actively control the board
Contain main program body.
Building a project
In this tutorial I will use two Arduino modules to build simple dust/pollution detector.
I will use:
- DMS501 dust sensor
- simple two-line LCD display (with rotary potentiometer) 2 lines with 16 letters to present a measuring result.
- As a controller I’m using Arduino Mega (clone) but all used modules can be attached to any Arduino board.
All of the modules that can be connected to microcontrollers have documentation with connection details.
Note:
There is large variety of modules that can be attached to Arduino, and its connecting pins may not be the same.
Producers always provide necessary support information. Search over Internet how to connect your modules,
There is plenty on tutorials for whatever display/module type you got.
There may be even few ways to connect each module, after building few contraptions you will find you how to do it.
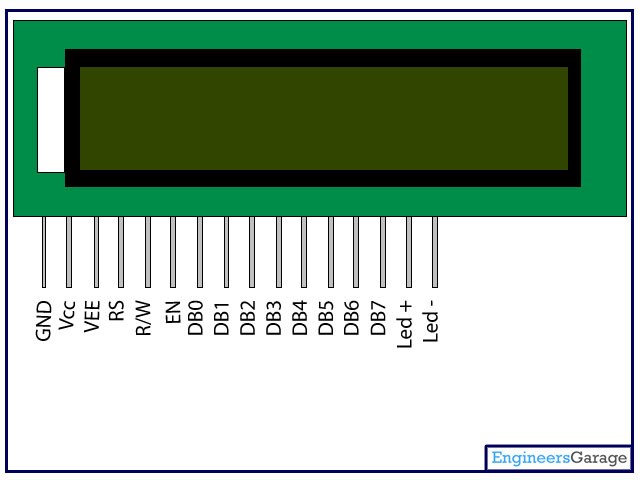
Connection pin diagram for LCD, as stated before, its not only way to do this with 2×16 LCD:
Pin Description:

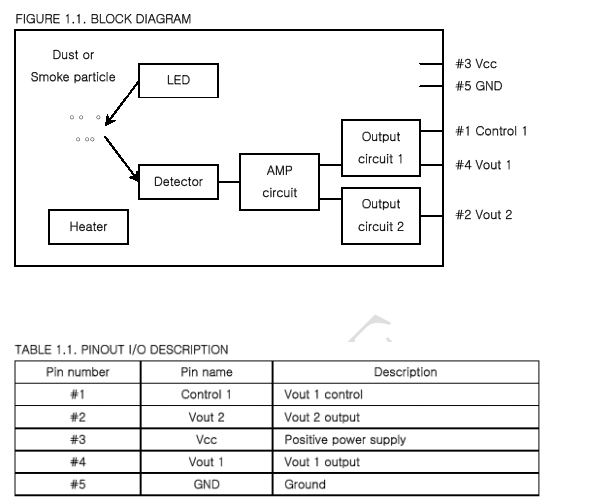
And dust sensor:
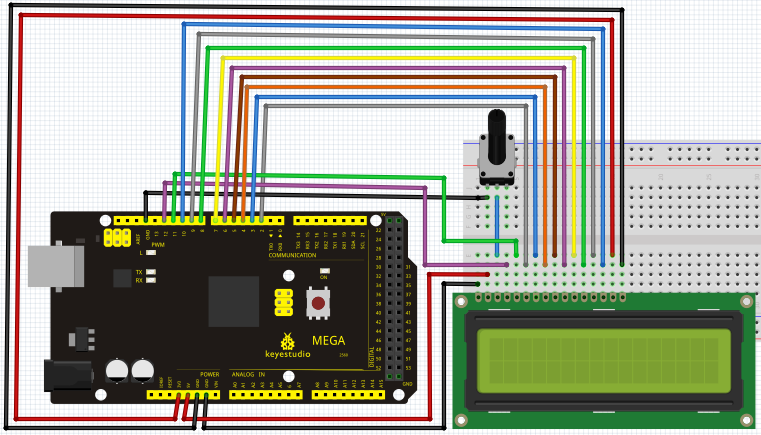
Complete connection schema :
Code – variables and libraries
This C++ code is universal and will work on any Arduino board or clone.
// include the library code:
#include<DSM501.h>
#include<LiquidCrystal.h>

// initialize the library by associating any needed LCD interface pin
// with the arduino pin number it is connected to
const int rs = 12, en = 11, d4 = 5, d5 = 4, d6 = 3, d7 = 2;
LiquidCrystal lcd(rs, en, d4, d5, d6, d7);

//initialize Sensor variables
#define DSM501_PM10 6
#define DSM501_PM25 7

DSM5O1 dsm501(DSM501_PM10, DSM501_PM25);
I have separated all variables to first section of code.
In a first part I’m including libraries for both modules to use it predefined methods later.
Other part is to define PINS to which cables are actually connected.
Setup ()
void setup ()
{
    Serial.begin(9600); //for output information, console

    // Initialize DSM501 Sensor
    dsm501.begin (MIN_WIN_SPAN);

    // Initialize LCD
    lcd.begin(16, 2);

    // wait 60s for DSM5O1 to warm up
    for (int i = 1; i <= 6O; i++)
    {
        delay(1000); // 1s
        Serial.print (i);
        Serial.printin(" s (wait 60s for Sensor to warm up)");

        lcd.setCursor(0, 0);
        lcd.print(i);
        lcd.print(" sec");
        lcd.setCursor(0, 1);
        lcd.print("Wait 60 to warm up");
    }
}
Setup part contain code that will be executed on start – once only.
Initialization for two modules.
Loop for warming up a sensor.
Printing info to console and to LCD
Loop ()
void loop()
{
    // call Sensor to handle updates.
    dsm501.update();
    //clear icd
    lcd.clear();
    // get PM density of particles over 1.0 pm
    Serial.print("PM10: ");
    Serial.print(dsm501.getParticalWeight(0));
    Serial.println(" ug/m3");
    //print info on LCD
    lcd.setCursor(0, 0);
    lcd.print("PM10:");
    lcd.print(dsm501.getParticalWeight(0));
    lcd.printin(" ug/m3"):
    // get PM density of particles over 2.5 pm
    Serial.print("PM25: ");
    Serial.print(dsm501.getParticalWeight(1));
    Serial.println(" ug/m3");
    //print info on LCD
    lcd.setCursor(0, 1);
    lcd.print("PM25:"):
    lcd.print(dsm501.getParticalWeight(1));
    lcd.print(" ug/m3");

}
Actual code that will be executed on device in endless loop.
Requesting data form sensor and clearing LCD to remove counting text.
I’m using dsm501 library methods to fetch density of particles information
to be later printed on LCD. I’m using this library because basically this sensor provides particles per square feet and this units don’t tell much in our country.
Lib contain not trivial calculation to convert it to µg/m3 (microgram per square meter)
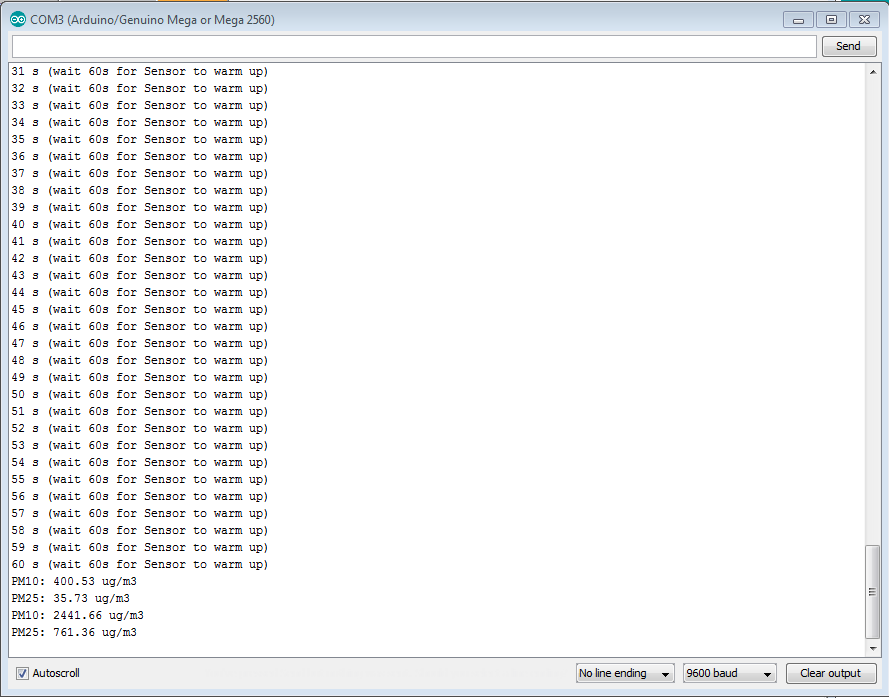
Console
Entering Tools->Serial Monitor will show console
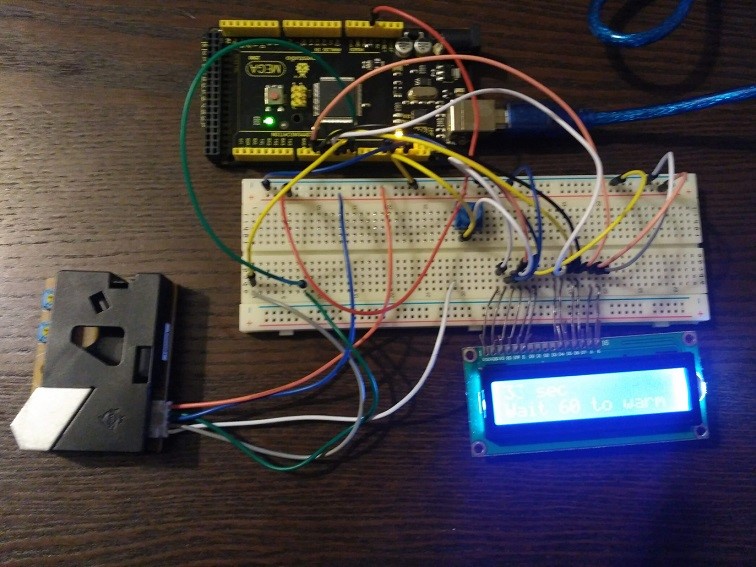
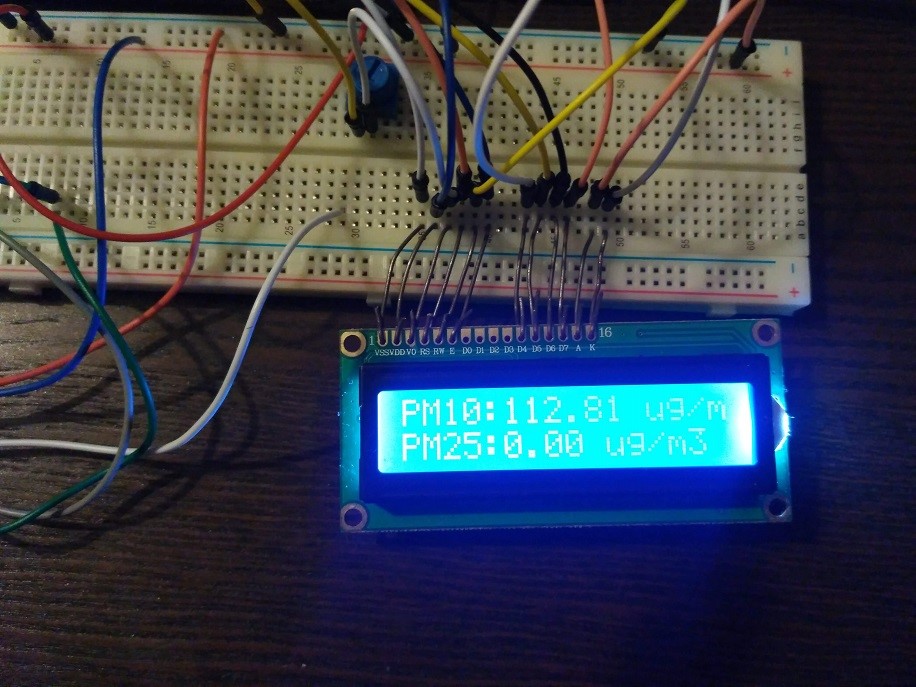
Final device
Summary
Arduino is a user-friendly microcontroller, easy to cheap and easy to start.
There are many different boards on the market and hundreds of different sensors, motors, modules etc.
That allow to build useful and complicated devices. All of it is well documented and there are lots of guides, YouTube videos and forums that will help to start, solve problems and make your life easier.
World of small electronics stays open for anybody who wish to try it.
Poznaj mageek of j‑labs i daj się zadziwić, jak może wyglądać praca z j‑People!
Skontaktuj się z nami