Introduction to Apache Cordova
What and for who is Apache Cordova?
If you want to create a mobile app for Android/iOS/Blackberry, but you do not have time to learn each of these technologies, Apache Cordova is for you. If you want to create a multiplatform mobile application fast that will work on all of the most popular mobile platforms, Apache Cordova is also for you.
With Apache Cordova you can create the mobile application using standard web technologies like HTML5, CSS3 and Javascript. You do not need to know programming language and tools set specific for all platforms. Cordova API gives you an access to device capabilities like camera, media, network, storage, geolocation, accelerometer, contacts and device information.
In this tutorial I will show how to start with Apache Cordova and how to create first simple application that will works on Android.
How to start?
At the beginning we need to install Cordova CLI. It will help us with generating project structure, adding support for new platforms etc.
- Download and install Node.js: https://nodejs.org/en/download/
- Install cordova module:
- Windows: npm install -g cordova
- Linux/OS: sudo npm install -g cordova
In this tutorial we would prepare application that will work on Android so we need to also install SDK for this platform:
- Install Java Development Kit (JDK7 or higher)
- Install Android SDK: https://developer.android.com/studio/install.html
If we would like to support more platforms we also need to install SDK tools for this platform ex. iOS.
First app
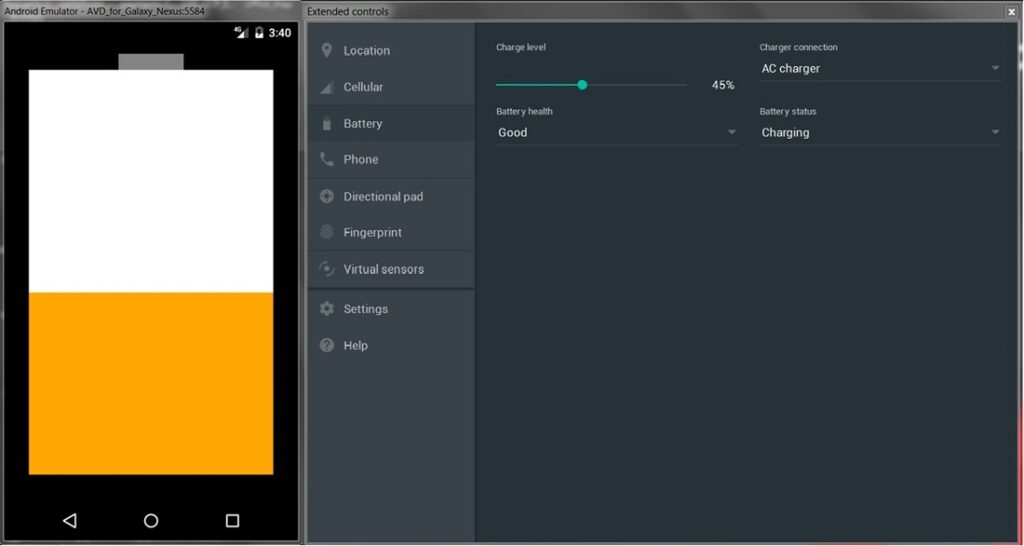
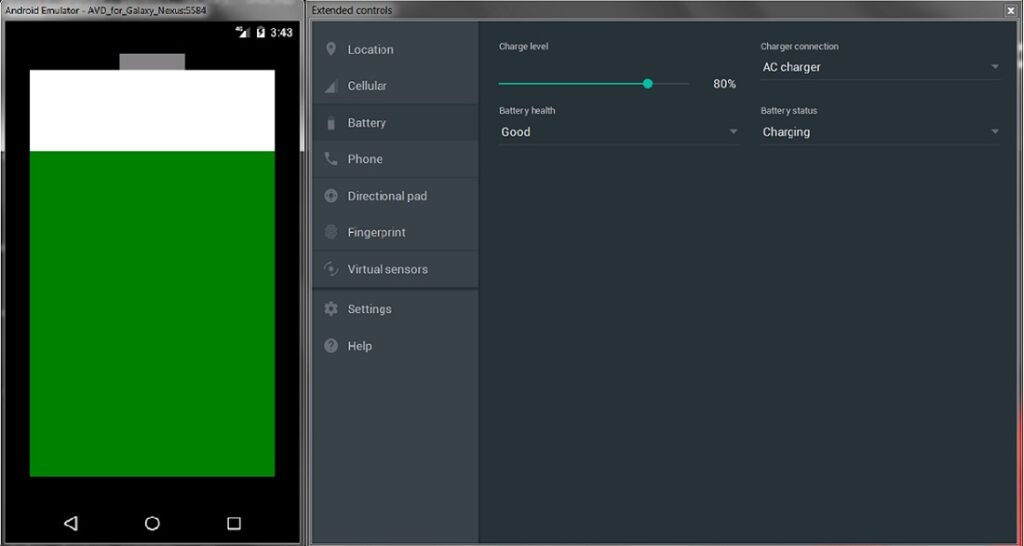
Now when we have all necessary libraries we can create our first Apache Cordova project. To show that Cordova framework give us possibility to use device information from javascript level I will create a very simple application showing battery level build in HTML, CSS and javascript.
In first step we need to create project:
cordova create batteryLevel com.example.batteryLevel BatteryLevel
Cordova creates for us whole project structure in batteryLevel directory.
Next we need to install plugins that we want to use in our application. In my tutorial it will be only one plugin: “cordova-plugin-battery-status”:
cordova plugin add cordova-plugin-battery-status
Now we will add platforms that we will target our app. I will add two platforms:
- Android:
cordova platform add android –save
- Browser (for test purpose):
cordova platform add android –save
Now we are ready to implement our functionality. All changes we will do in www directory.
Index.html is our main file. In this file we are importing javascript libraries, css files, other html files etc. Definitely we need to import:
- cordova.js – Cordova library
- app.js – cordova app initialization, implementation our functionality, etc.
- jquery-3.1.1.min.js – it is not necessary, but very helpfully
In our BatteryLevel application html content is very simple:
<body>
    <div>
        <div id="batteryLevelContent">
            <div id="batteryTop"></div>
            <div id="chargeLevelContent"></div>
        </div>

    </div>
    <script type="text/javascript" src="cordova.js"></script>
    <script type="text/javascript" src="js/jquery-3.1.1.min.js"></script>
    <script type="text/javascript" src="js/app.js"></script>
</body>
Below quick look at css file:
body {
    background-color:#000;
    font-family: Arial, sans-serif;
    font-size:12px;
    height:100%;
    margin:0px;
    padding:0px;
    text-transform:uppercase;
    width:100%;
}

#batteryLevelContent {
    width: 300px;
    margin: 0 auto;
    height: 500px;
    background: #fff;
    position: absolute;
    left: 50%;
    margin-left: -150px;
    top: 50%;
    margin-top: -250px;

}

#chargeLevelContent {
    height: 1%;
    width: 100%;
    background: red;
    position: absolute;
    bottom: 0;
    left: 0;
}

#chargeLevelContent.high {
    background: green;
}

#chargeLevelContent.medium {
    background: orange;
}

#chargeLevelContent.low {
    background: red;
}

#batteryTop {
    width: 80px;
    height: 20px;
    background: gray;
    position: absolute;
    top: -20px;
    left: 50%;
    margin-left: -40px;
}
As we can see nothing special. Standard css and html file.
Unusual part we can find in app.js. Heart of our application is function onBatteryStatus:
onBatteryStatus: function(status) {
    $('#chargeLevelContent').css('height', status.level+'%');

    $('#chargeLevelContent').removeClass("high");
    $('#chargeLevelContent').removeClass("medium");
    $('#chargeLevelContent').removeClass("low");
    if(status.level >= 65) {
        $('#chargeLevelContent').addClass("high");
    } else if(status.level < 65 && status.level >= 35) {
        $('#chargeLevelContent').addClass("medium");
    } else {
        $('#chargeLevelContent').addClass("low");
    }
}
It is responsible for showing an actual battery level in our device. This function should be registered in deviceready listener and will be executed by cordova library after every battery level change or plug/unplug to charger:
window.addEventListener("batterystatus", this.onBatteryStatus, false);First run
BatteryLevel application is ready, so it is the time to first test.
We should start with making a build:
cordova build
If build was successful, we can run our application. As you remember I added two platforms: browser and android. If we want to test changes in view we can run only browser version (is faster):
cordova emulate browser
To test the whole functionality we need to test our application in android environment. We can do this in two ways:
- Copy *.apk file generated during build to our real device, install application and test.
- Run application in Android emulator. To this we need to first create AVD (details: https://developer.android.com/studio/run/managing-avds.html). If we have AVD we can execute command:
cordova emulate android


Now we can say that we are android developers without any line code in JAVA.
Poznaj mageek of j‑labs i daj się zadziwić, jak może wyglądać praca z j‑People!
Skontaktuj się z nami


