GitLab pipelines
Recently, the CI/CD approach has been very popular. We are going to push albo deploy our changes to the environment as quickly as possible. Thanks to microservices and dividing our projects into smaller independent pieces, it is much easier. Thanks to gitlab pipelines, we can have everything in one place. We can build, test, deploy, and much more thanks to pipelines. In this article, I will show how pipelines work, based on a simple springboot project. All articles and cases are prepared based on my gitlab account. We can create a free account, which helps us learn. The free plan gives us enough features to learn and understand CI/CD.
Predictions for the project
I will create a simple SpringBoot project to see how pipelines works. We will create project witch some test to see how everything is processed by pipelines. (Project is available here: https://gitlab.com/michaltomasznowak/spring_rest_application/)
SpringBoot Rest application
We have a simple Maven application. Now what we want to do is create a jar and run a junit test of our application (in a shortcut). Localy on the machine, we will do this using the maven command mvn install. But what if we want to have an automated process to build, test, and deploy our application? Then we can create a CI/CD structure using gitlab pipelines. From the gitlab documentation we have:
Pipelines are the top-level component of continuous integration, delivery, and deployment.
Pipelines comprise:
- Jobs, which define what to do. For example, jobs that compile or test code.
- Stages, which define when to run the jobs. For example, stages that run tests after stages that compile the code.
Every pipeline that works needs an environment called a "runner." The runner is some kind of system where we can run our pipelines. Of course, it depends on the type of our application (ex. Java, Terraform, Nodejs). We need different environments, so for that, we use Docker images. So, to summarize, runner is a virtual operating system, for example, some kind of Linux, and on this, we have installed Docker, and now when we run our pipelines we can use every Docker image to run our pipelines. Here is a simple structure:
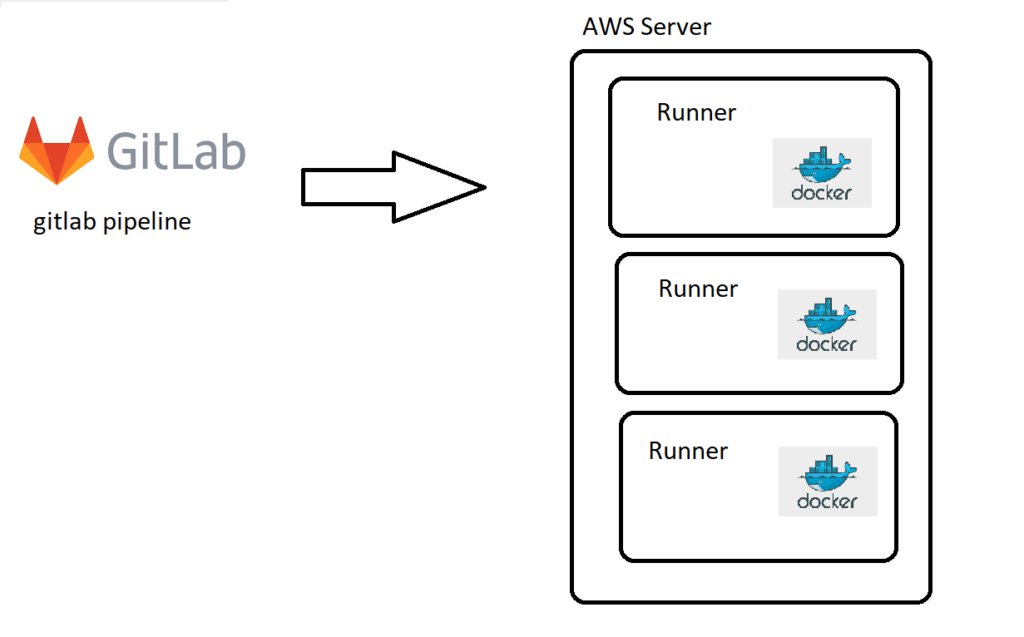
Of course, we can have more than one runner. Thanks to that, we can run many pipelines at the same time and jobs in the same stage paraller (if there is no dependency between them).
The whole configuration of our pipelines is defined in .gitlab-ci.yml file.
Let’s see an example pipeline .gitlab-ci.yml file of our project:
stages:
  - build

maven-build-jdk-11:
  image: maven:3-jdk-11
  stage: build
  script: "mvn package -B"
  artifacts:
    paths:
      - target/*.jar
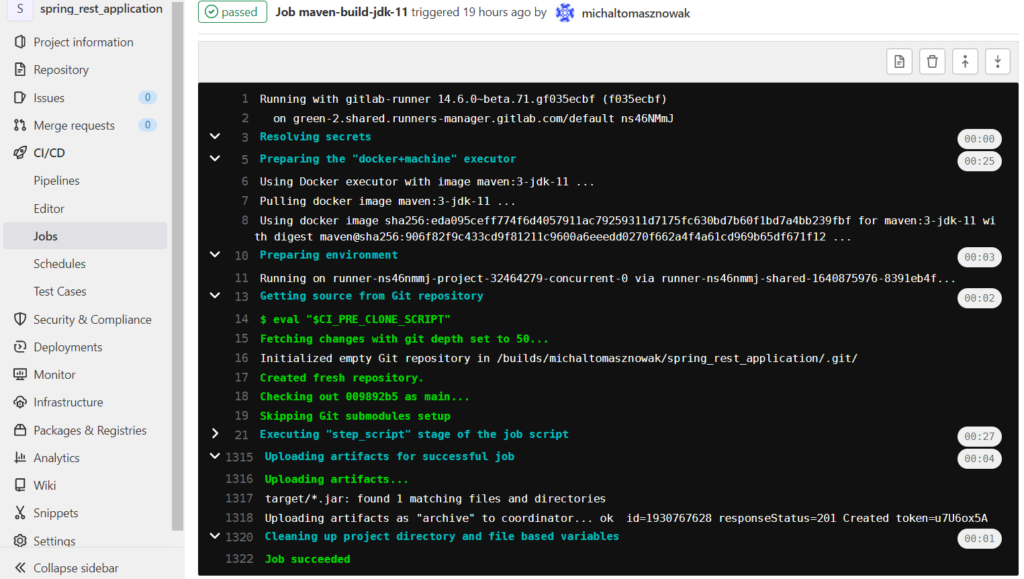
In this case, we have stage build with one job, maven-build-jdk-11. So we start this pipeline on runner. After that, runner will download a Docker image with Java and Maven:
image: maven:3-jdk-11Then on the started container, we run commend:
script: "mvn package -B"and we use a paths to connect from the docker destination to the outside (similar to the docker volume).
artifacts:
    paths:
      - target/*.jar
We do this, because we want the other jobs to have access to the created jar, since, after job docker container dies, we lose all data.
The whole process can be followed in the gitlab console:
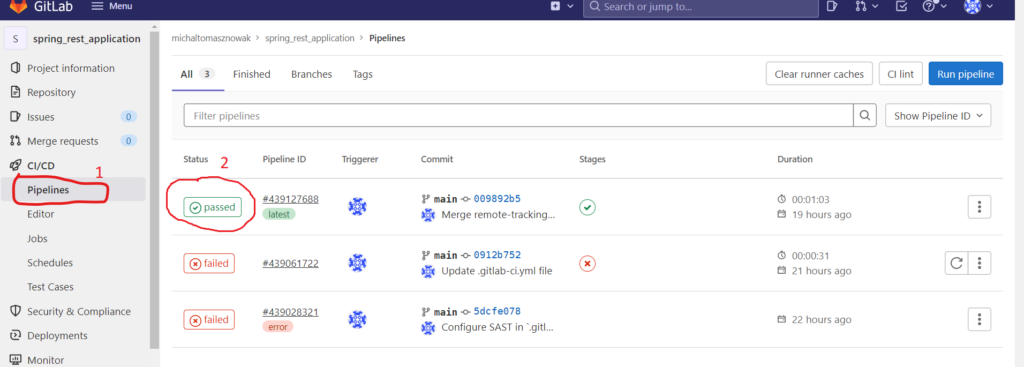
If we click on job (2), then we will see all the jobs in our pipeline:
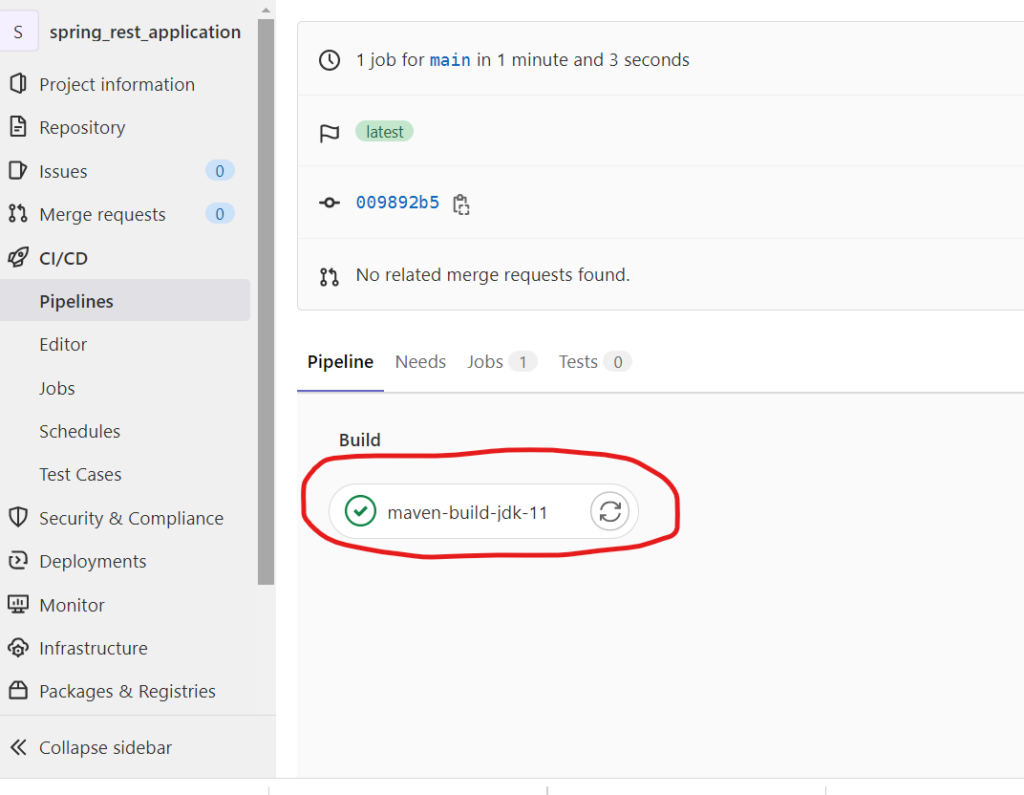
Now if we click on job, we will see the whole process:
Multiple jobs in one stage
Now I will show you the next example with many jobs in one stage. To simplify the example, the jobs will only be a simple commands.
stages:
  - build

maven-build-jdk-11:
  image: maven:3-jdk-11
  stage: build
  script: "mvn package -B"
  artifacts:
    paths:
      - target/*.jar

job_2:
  stage: build
  script: "ls -l"
For this code, our jobs started in parallel, because there was no dependency between them.

Result from job2:
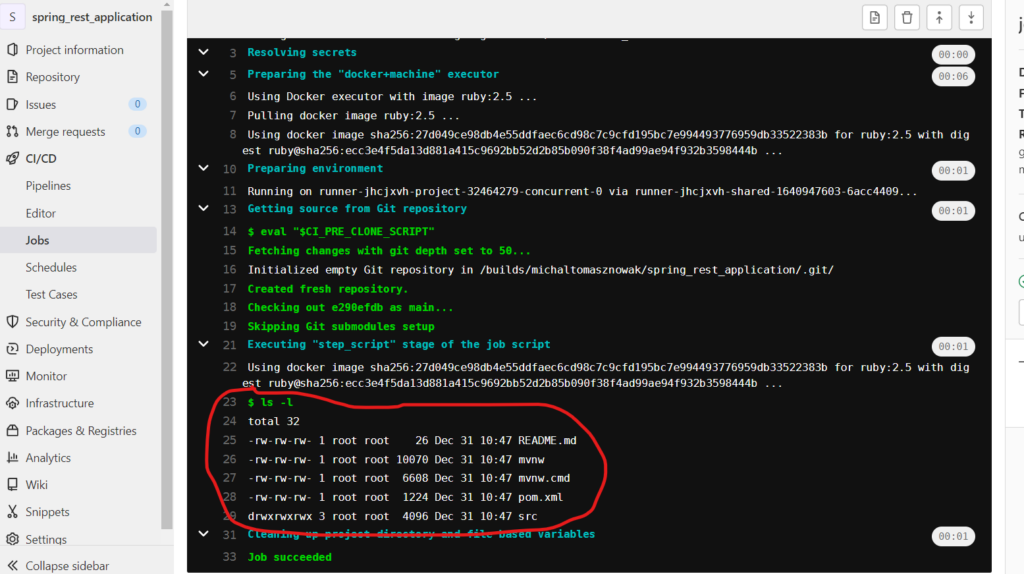
Now let’s consider a similar case with dependency. Let’s add to job 2 needs keyword:
job_2:
  stage: build
  script: "ls -l"
  needs:
    - maven-build-jdk-11
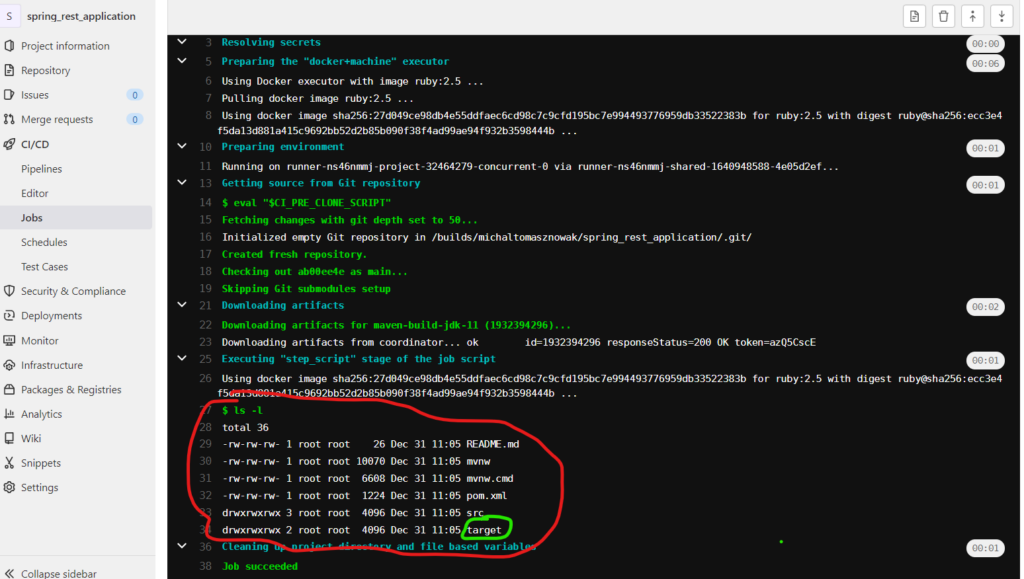
Now the job is waiting to start until maven-build-jdk-11 is finished.

Let’s see the result. Now, because we are waiting for maven-build-jdk-11 we have a target folder:
Stages
Now let’s move our job2 to a different stage. In this stage, we will deploy our created jar file from the previous stage build to an AWS S3 bucket. Before that, we need to configure CI variables with credentials to our AWS. To accomplish this, we must first enter the CI variable settings:
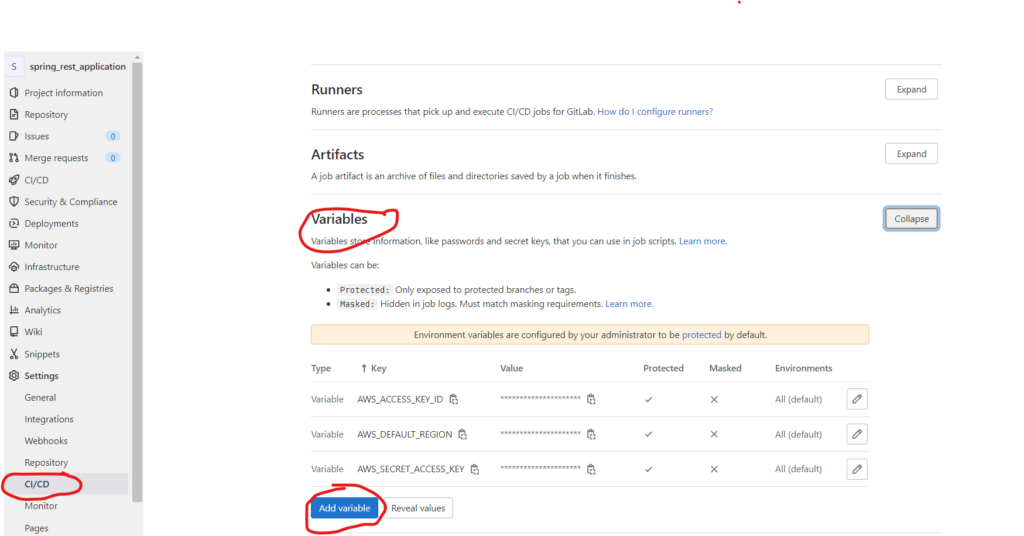
We need to add three variables:
- AWS_ACCESS_KEY_ID
- AWS_SECRET_ACCESS_KEY
- AWS_DEFAULT_REGION
Values for these variables will be given by IAM in AWS.
Now let’s see our new stage job:
stages:
  - build
  - deploy

maven-build-jdk-11:
  image: maven:3-jdk-11
  stage: build
  script: "mvn package -B"
  artifacts:
    paths:
      - target/*.jar

job_2:
  image:
    name: amazon/aws-cli
    entrypoint: [""]
  stage: deploy
  before_script:
    - export AWS_ACCESS_KEY_ID=$TEST_AWS_ACCESS_KEY_ID
    - export AWS_SECRET_ACCESS_KEY=$TEST_AWS_SECRET_ACCESS_KEY
    - export AWS_DEFAULT_REGION=$TEST_AWS_DEFAULT_REGION
  script:
    - aws --version
    - aws s3 cp foo.bar s3://bucketmn/foo.txt
In this case, in job_2, we will use amazon/aws-cli docker image to have an AWS cli. In this part of the code:

    before_script:
    - export AWS_ACCESS_KEY_ID=$TEST_AWS_ACCESS_KEY_ID
    - export AWS_SECRET_ACCESS_KEY=$TEST_AWS_SECRET_ACCESS_KEY
    - export AWS_DEFAULT_REGION=$TEST_AWS_DEFAULT_REGION
We needed to copy our previous set of variables to a docker container. After that, we call commands related to AWS cli:

    - aws --version
    - aws s3 cp foo.bar s3://bucketmn/foo.txt
2 stages:

We copied our jar generated in the previous job to an s3 bucket with the new name spring.jar.

Variables
As you saw before, we set AWS credential values as variables. Those types of variables are set permanently, and we get access to them every time we run a pipeline in our project. But we can set another variable before every run of our pipeline manually. To do this:
Click Run Pipeline:
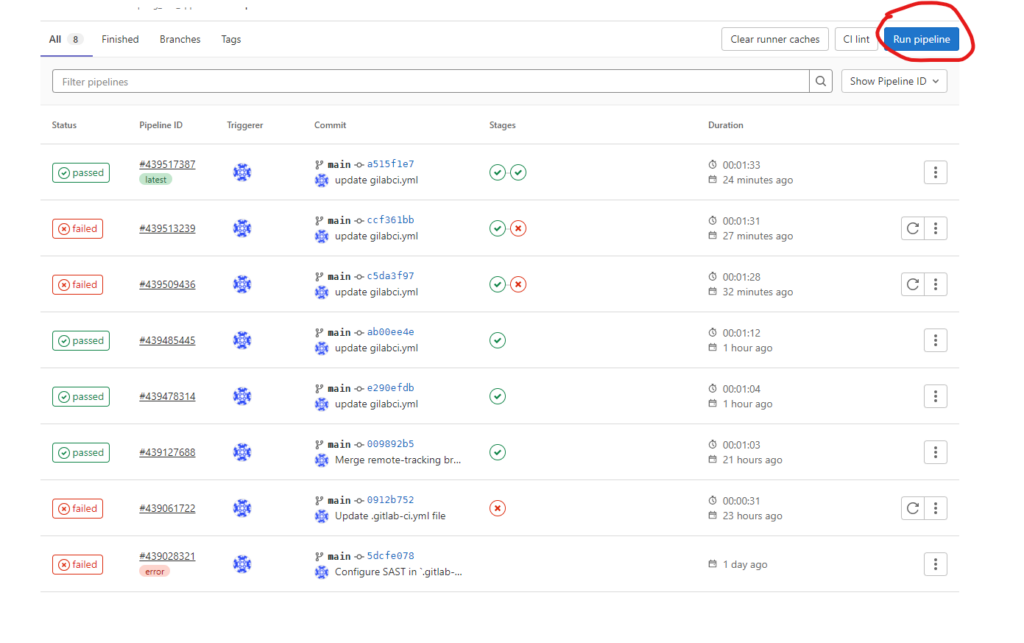
Here we choose which branch we want to run the pipeline on and set the variable:

To get the value of this variable, we use $. This variable we can use, for example, to run or avoid some jobs. Let’s see an example:
.go_release:
  rules:
    - if: '$release != "true"'
      when: never

job_3:
  stage: release
  script:
    - echo "$release"
  rules:
    - !reference [.go_release, rules]
In this case, we used a new feature of gitLab called !reference [.go_release, rules]. Thanks to that, we can separate and join our conditions, which makes our code much easier and readable. We created a condition:
.go_release:
  rules:
    - if: '$release != "true"'
      when: never
    - if: '$release == "true"'
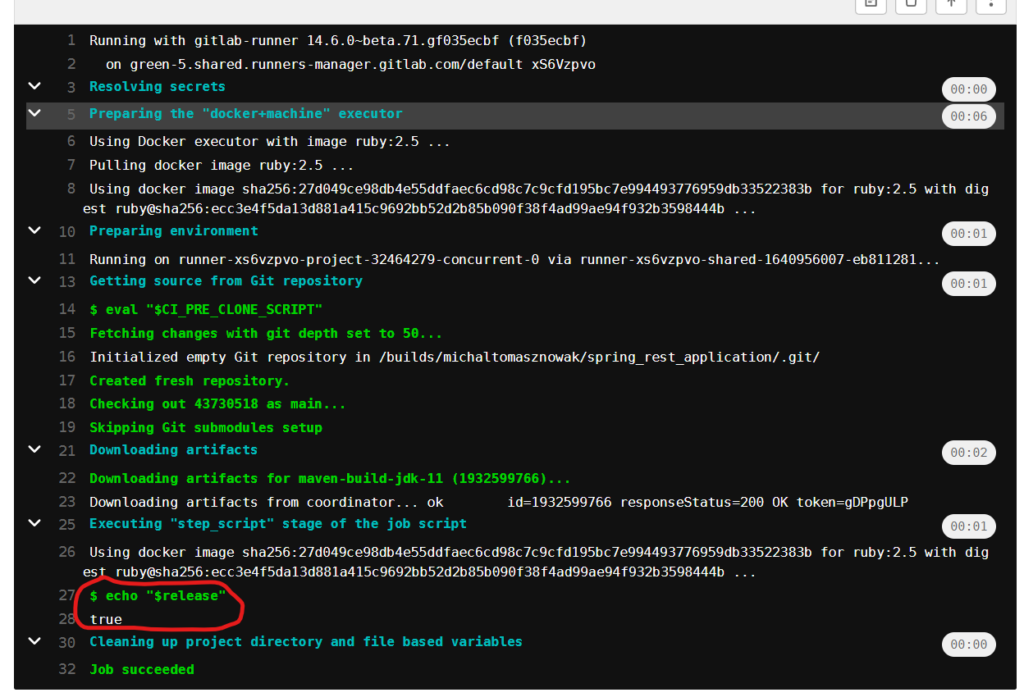
This condition checks our previous set variable release. If the variable is not set, this job will never be triggered. When we set this variable to true, this job will be run and we will see the result:
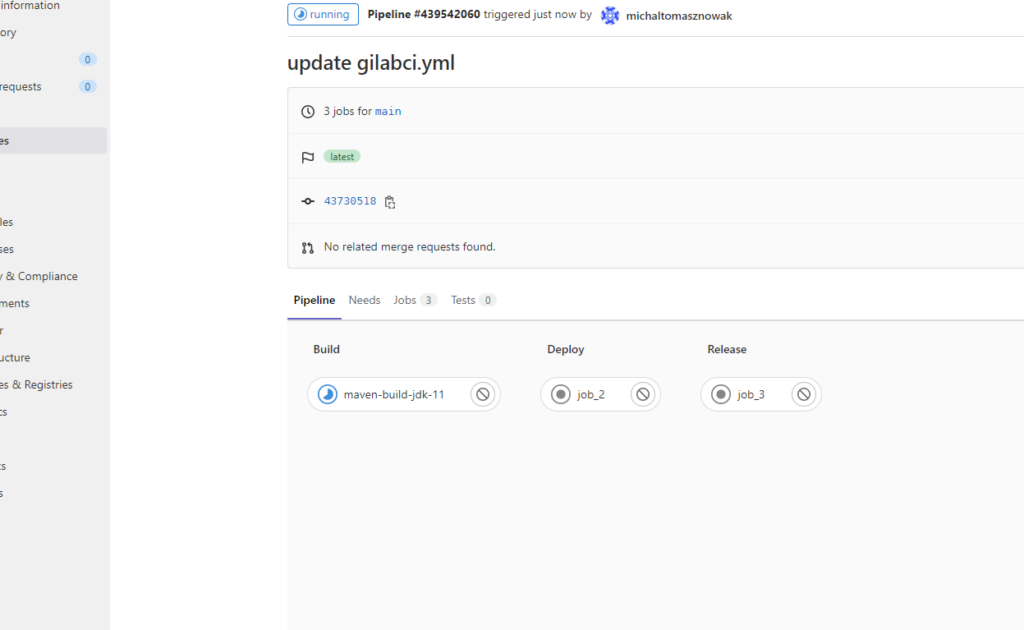
And here is a result of this job:
gitLab API
The next great thing, which I want to show in this article, is the possibility to call our jobs by API. Thanks to that, we can use another application to communicate with our gitlab pipelines. For example, when we change something in configuration and that needs a new deployment of our application or when we want to have, for example, an outside system to manage our pipelines.
Creating an API is very easy. We can do this by configuring a trigger token here:
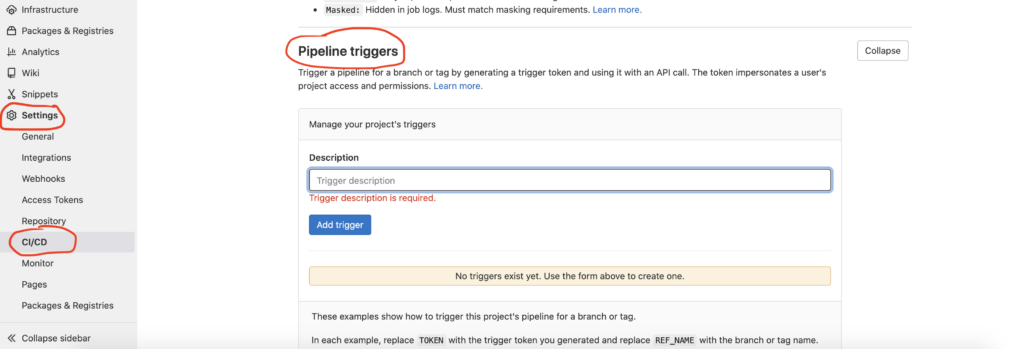
We have a really nice description of how to call our pipeline:
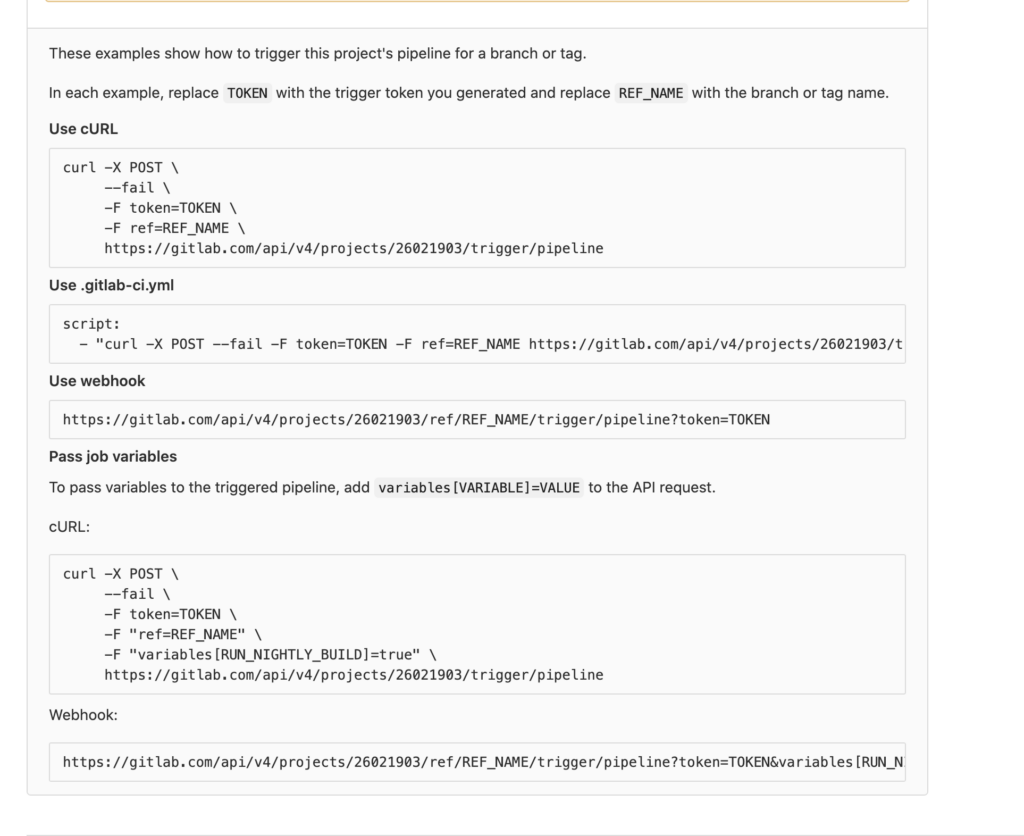
We will try to call our pipeline by curl. Here TOKEN is our generated token and REF_NAME is the branch name.
curl -X POST --fail -F token=3017969a1f58913a35b3c37af8b162 -F ref=main https://gitlab.com/api/v4/projects/32464279/In response, we get:
{
   "id":440317423,
   "iid":24,
   "project_id":32464279,
   "sha":"43730518e4fb78e1fc66b58c0c447c36ba6a685b",
   "ref":"main",
   "status":"created",
   "source":"trigger",
   "created_at":"2022-01-03T10:01:35.475Z",
   "updated_at":"2022-01-03T10:01:35.475Z",
   "web_url":"https://gitlab.com/michaltomasznowak/spring_rest_application/-/pipelines/440317423",
   "before_sha":"0000000000000000000000000000000000000000",
   "tag":false,
   "yaml_errors":null,
   "user":{
      "id":10528456,
      "username":"michaltomasznowak",
      "name":"michaltomasznowak",
      "state":"active",
      "avatar_url":"https://secure.gravatar.com/avatar/300316e59189a08aa73f74298eb5a1ea?s=80\u0026d=identicon",
      "web_url":"https://gitlab.com/michaltomasznowak"
   },
   "started_at":null,
   "finished_at":null,
   "committed_at":null,
   "duration":null,
   "queued_duration":null,
   "coverage":null,
   "detailed_status":{
      "icon":"status_created",
      "text":"created",
      "label":"created",
      "group":"created",
      "tooltip":"created",
      "has_details":true,
      "details_path":"/michaltomasznowak/spring_rest_application/-/pipelines/440317423",
      "illustration":null,
      "favicon":"/assets/ci_favicons/favicon_status_created-4b975aa976d24e5a3ea7cd9a5713e6ce2cd9afd08b910415e96675de35f64955.png"
   }
}
Trigger pipelines between multiple projects
Sometimes we have situations when, during one call of a pipeline, we want to trigger a pipeline in other projects. In a pipeline, we can easily do this by using the keyword trigger For this test, we created another project spring-rest-application-to-trigger (the project is available here: https://gitlab.com/michaltomasznowak/spring-rest-application-to-trigger). From spring-rest-application, we’d like to call spring-rest-application project. To do this, we need to add the code:
trigger:
  stage: trigger
  trigger:
    project: michaltomasznowak/spring-rest-application-to-trigger
    branch: main
In the pipeline gui, we can see the triggered pipeline from another project:

Summary
In this article, I showed how to create a simple pipeline for our project. We saw some basic how-tos for working on stages and jobs. We saw how to use variables and how to connect with AWS.
For me, the most important thing from this article is to understand the relationship between runner pipelines and dockers. As a result of the code written as our pipelines, we can execute commands on runners. For example, thanks to the script keyword, we can call and run all commands supported by the downloaded Docker image into the runner.
References
Meet the geek-tastic people, and allow us to amaze you with what it's like to work with j‑labs!
Contact us


